Tutorial 2 : The first triangle
This will be another long tutorial.
OpenGL 3 makes it easy to write complicated stuff, but at the expense that drawing a simple triangle is actually quite difficult.
Don’t forget to cut’n paste the code on a regular basis.
If the program crashes at startup, you’re probably running from the wrong directory. Read CAREFULLY the first tutorial and the FAQ on how to configure Visual Studio !
The VAO
I won’t dig into details now, but you need to create a Vertex Array Object and set it as the current one :
GLuint VertexArrayID;
glGenVertexArrays(1, &VertexArrayID);
glBindVertexArray(VertexArrayID);
Do this once your window is created (= after the OpenGL Context creation) and before any other OpenGL call.
If you really want to know more about VAOs, there are a few other tutorials out there, but this is not very important.
Screen Coordinates
A triangle is defined by three points. When talking about “points” in 3D graphics, we usually use the word “vertex” ( “vertices” on the plural ). A vertex has 3 coordinates : X, Y and Z. You can think about these three coordinates in the following way :
- X in on your right
- Y is up
- Z is towards your back (yes, behind, not in front of you)
But here is a better way to visualize this : use the Right Hand Rule
- X is your thumb
- Y is your index
- Z is your middle finger. If you put your thumb to the right and your index to the sky, it will point to your back, too.
Having the Z in this direction is weird, so why is it so ? Short answer : because 100 years of Right Hand Rule Math will give you lots of useful tools. The only downside is an unintuitive Z.
On a side note, notice that you can move your hand freely : your X, Y and Z will be moving, too. More on this later.
So we need three 3D points in order to make a triangle ; let’s go :
// An array of 3 vectors which represents 3 vertices
static const GLfloat g_vertex_buffer_data[] = {
   -1.0f, -1.0f, 0.0f,
   1.0f, -1.0f, 0.0f,
   0.0f,  1.0f, 0.0f,
};
The first vertex is (-1,-1,0). This means that unless we transform it in some way, it will be displayed at (-1,-1) on the screen. What does this mean ? The screen origin is in the middle, X is on the right, as usual, and Y is up. This is what it gives on a wide screen :
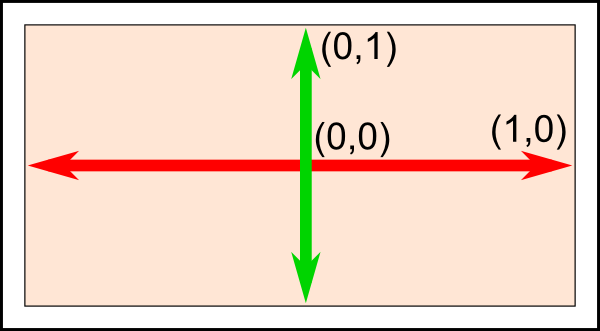
This is something you can’t change, it’s built in your graphics card. So (-1,-1) is the bottom left corner of your screen. (1,-1) is the bottom right, and (0,1) is the middle top. So this triangle should take most of the screen.
Drawing our triangle
The next step is to give this triangle to OpenGL. We do this by creating a buffer:
// This will identify our vertex buffer
GLuint vertexbuffer;
// Generate 1 buffer, put the resulting identifier in vertexbuffer
glGenBuffers(1, &vertexbuffer);
// The following commands will talk about our 'vertexbuffer' buffer
glBindBuffer(GL_ARRAY_BUFFER, vertexbuffer);
// Give our vertices to OpenGL.
glBufferData(GL_ARRAY_BUFFER, sizeof(g_vertex_buffer_data), g_vertex_buffer_data, GL_STATIC_DRAW);
This needs to be done only once.
Now, in our main loop, where we used to draw “nothing”, we can draw our magnificent triangle :
// 1st attribute buffer : vertices
glEnableVertexAttribArray(0);
glBindBuffer(GL_ARRAY_BUFFER, vertexbuffer);
glVertexAttribPointer(
   0,                  // attribute 0. No particular reason for 0, but must match the layout in the shader.
   3,                  // size
   GL_FLOAT,           // type
   GL_FALSE,           // normalized?
   0,                  // stride
   (void*)0            // array buffer offset
);
// Draw the triangle !
glDrawArrays(GL_TRIANGLES, 0, 3); // Starting from vertex 0; 3 vertices total -> 1 triangle
glDisableVertexAttribArray(0);
If you’re lucky, you can see the result in white. (Don’t panic if you don’t some systems require a shader to show anything) :
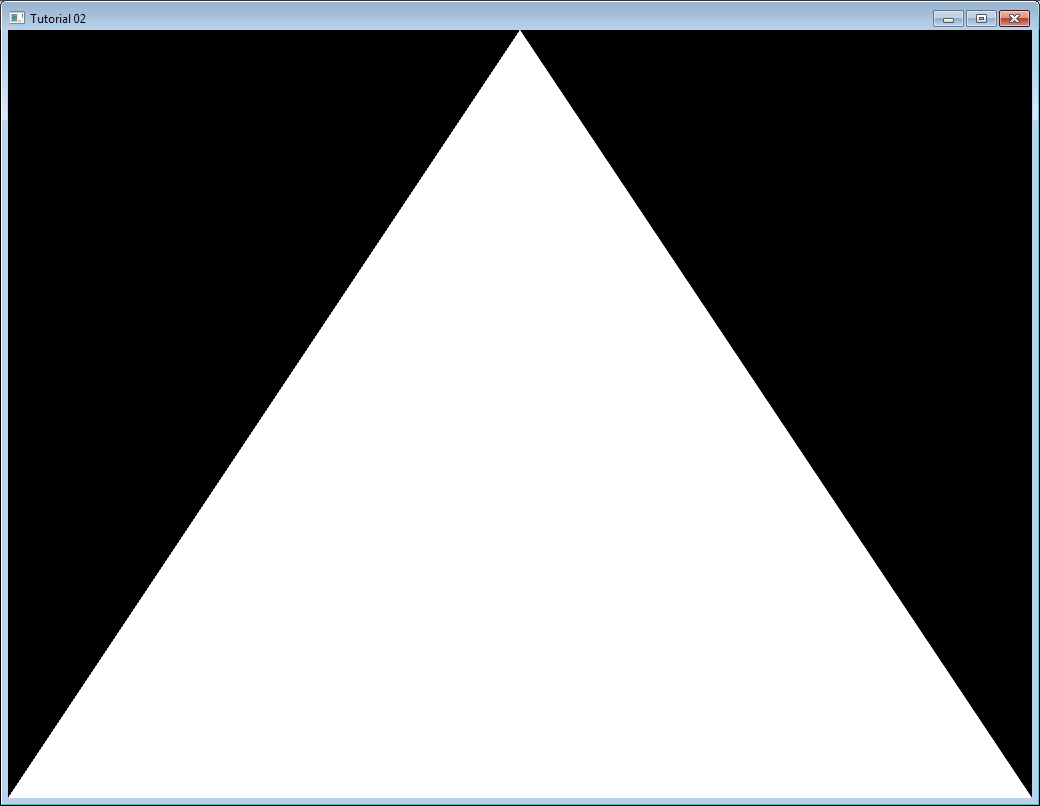
Now this is some boring white. Let’s see how we can improve it by painting it in red. This is done by using something called shaders.
Shaders
Shader Compilation
In the simplest possible configuration, you will need two shaders : one called Vertex Shader, which will be executed for each vertex, and one called Fragment Shader, which will be executed for each sample. And since we use 4x antialising, we have 4 samples in each pixel.
Shaders are programmed in a language called GLSL : GL Shader Language, which is part of OpenGL. Unlike C or Java, GLSL has to be compiled at run time, which means that each and every time you launch your application, all your shaders are recompiled.
The two shaders are usually in separate files. In this example, we have SimpleFragmentShader.fragmentshader and SimpleVertexShader.vertexshader . The extension is irrelevant, it could be .txt or .glsl .
So here’s the code. It’s not very important to fully understand it, since you often do this only once in a program, so comments should be enough. Since this function will be used by all other tutorials, it is placed in a separate file : common/loadShader.cpp . Notice that just as buffers, shaders are not directly accessible : we just have an ID. The actual implementation is hidden inside the driver.
GLuint LoadShaders(const char * vertex_file_path,const char * fragment_file_path){

	// Create the shaders
	GLuint VertexShaderID = glCreateShader(GL_VERTEX_SHADER);
	GLuint FragmentShaderID = glCreateShader(GL_FRAGMENT_SHADER);

	// Read the Vertex Shader code from the file
	std::string VertexShaderCode;
	std::ifstream VertexShaderStream(vertex_file_path, std::ios::in);
	if(VertexShaderStream.is_open()){
		std::stringstream sstr;
		sstr << VertexShaderStream.rdbuf();
		VertexShaderCode = sstr.str();
		VertexShaderStream.close();
	}else{
		printf("Impossible to open %s. Are you in the right directory ? Don't forget to read the FAQ !\n", vertex_file_path);
		getchar();
		return 0;
	}

	// Read the Fragment Shader code from the file
	std::string FragmentShaderCode;
	std::ifstream FragmentShaderStream(fragment_file_path, std::ios::in);
	if(FragmentShaderStream.is_open()){
		std::stringstream sstr;
		sstr << FragmentShaderStream.rdbuf();
		FragmentShaderCode = sstr.str();
		FragmentShaderStream.close();
	}

	GLint Result = GL_FALSE;
	int InfoLogLength;

	// Compile Vertex Shader
	printf("Compiling shader : %s\n", vertex_file_path);
	char const * VertexSourcePointer = VertexShaderCode.c_str();
	glShaderSource(VertexShaderID, 1, &VertexSourcePointer , NULL);
	glCompileShader(VertexShaderID);

	// Check Vertex Shader
	glGetShaderiv(VertexShaderID, GL_COMPILE_STATUS, &Result);
	glGetShaderiv(VertexShaderID, GL_INFO_LOG_LENGTH, &InfoLogLength);
	if ( InfoLogLength > 0 ){
		std::vector<char> VertexShaderErrorMessage(InfoLogLength+1);
		glGetShaderInfoLog(VertexShaderID, InfoLogLength, NULL, &VertexShaderErrorMessage[0]);
		printf("%s\n", &VertexShaderErrorMessage[0]);
	}

	// Compile Fragment Shader
	printf("Compiling shader : %s\n", fragment_file_path);
	char const * FragmentSourcePointer = FragmentShaderCode.c_str();
	glShaderSource(FragmentShaderID, 1, &FragmentSourcePointer , NULL);
	glCompileShader(FragmentShaderID);

	// Check Fragment Shader
	glGetShaderiv(FragmentShaderID, GL_COMPILE_STATUS, &Result);
	glGetShaderiv(FragmentShaderID, GL_INFO_LOG_LENGTH, &InfoLogLength);
	if ( InfoLogLength > 0 ){
		std::vector<char> FragmentShaderErrorMessage(InfoLogLength+1);
		glGetShaderInfoLog(FragmentShaderID, InfoLogLength, NULL, &FragmentShaderErrorMessage[0]);
		printf("%s\n", &FragmentShaderErrorMessage[0]);
	}

	// Link the program
	printf("Linking program\n");
	GLuint ProgramID = glCreateProgram();
	glAttachShader(ProgramID, VertexShaderID);
	glAttachShader(ProgramID, FragmentShaderID);
	glLinkProgram(ProgramID);

	// Check the program
	glGetProgramiv(ProgramID, GL_LINK_STATUS, &Result);
	glGetProgramiv(ProgramID, GL_INFO_LOG_LENGTH, &InfoLogLength);
	if ( InfoLogLength > 0 ){
		std::vector<char> ProgramErrorMessage(InfoLogLength+1);
		glGetProgramInfoLog(ProgramID, InfoLogLength, NULL, &ProgramErrorMessage[0]);
		printf("%s\n", &ProgramErrorMessage[0]);
	}

	glDetachShader(ProgramID, VertexShaderID);
	glDetachShader(ProgramID, FragmentShaderID);

	glDeleteShader(VertexShaderID);
	glDeleteShader(FragmentShaderID);

	return ProgramID;
}
Our Vertex Shader
Let’s write our vertex shader first. The first line tells the compiler that we will use OpenGL 3’s syntax.
#version 330 core
The second line declares the input data :
layout(location = 0) in vec3 vertexPosition_modelspace;
Let’s explain this line in detail :
- “vec3” is a vector of 3 components in GLSL. It is similar (but different) to the glm::vec3 we used to declare our triangle. The important thing is that if we use 3 components in C++, we use 3 components in GLSL too.
- “layout(location = 0)” refers to the buffer we use to feed the vertexPosition_modelspace attribute. Each vertex can have numerous attributes : A position, one or several colours, one or several texture coordinates, lots of other things. OpenGL doesn’t know what a colour is : it just sees a vec3. So we have to tell him which buffer corresponds to which input. We do that by setting the layout to the same value as the first parameter to glVertexAttribPointer. The value “0” is not important, it could be 12 (but no more than glGetIntegerv(GL_MAX_VERTEX_ATTRIBS, &v) ), the important thing is that it’s the same number on both sides.
- “vertexPosition_modelspace” could have any other name. It will contain the position of the vertex for each run of the vertex shader.
- “in” means that this is some input data. Soon we’ll see the “out” keyword.
The function that is called for each vertex is called main, just as in C :
void main(){
Our main function will merely set the vertex’ position to whatever was in the buffer. So if we gave (1,1), the triangle would have one of its vertices at the top right corner of the screen. We’ll see in the next tutorial how to do some more interesting computations on the input position.
  gl_Position.xyz = vertexPosition_modelspace;
  gl_Position.w = 1.0;
}
gl_Position is one of the few built-in variables : you *have *to assign some value to it. Everything else is optional; we’ll see what “everything else” means in Tutorial 4.
Our Fragment Shader
For our first fragment shader, we will do something really simple : set the color of each fragment to red. (Remember, there are 4 fragment in a pixel because we use 4x AA)
#version 330 core
out vec3 color;
void main(){
  color = vec3(1,0,0);
}
So yeah, vec3(1,0,0) means red. This is because on computer screens, colour is represented by a Red, Green, and Blue triplet, in this order. So (1,0,0) means Full Red, no green and no blue.
Putting it all together
Import our LoadShaders function as the last include:
#include <common/shader.hpp>
Before the main loop, call our LoadShaders function:
// Create and compile our GLSL program from the shaders
GLuint programID = LoadShaders( "SimpleVertexShader.vertexshader", "SimpleFragmentShader.fragmentshader" );
Now inside the main loop, first clear the screen. This will change the background color to dark blue because of the previous glClearColor(0.0f, 0.0f, 0.4f, 0.0f) call:
glClear(GL_COLOR_BUFFER_BIT | GL_DEPTH_BUFFER_BIT);
and then tell OpenGL that you want to use your shader:
// Use our shader
glUseProgram(programID);
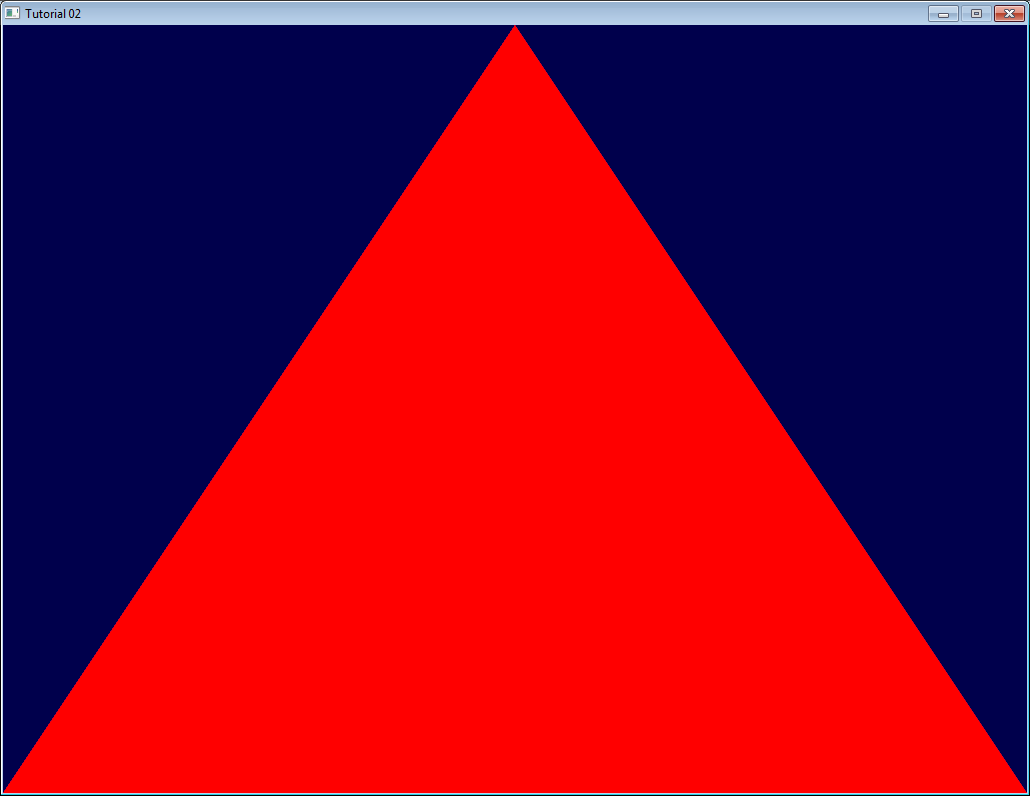
// Draw triangle...
… and presto, here’s your red triangle !
In the next tutorial we’ll learn transformations : How to setup your camera, move your objects, etc.